PipingNotes

Design-Engineering-Construction-Testing & Commissioning of piping

Browsing:

Category: Articles

Stress Analysis Calculations for Pipelines

How to Perform Stress Analysis Calculations for Pipelines

Stress analysis ensures the pipeline is safe against all loading conditions throughout its life: pressure, temperature, weight, seismic, settlement, occasional loads (wind, earthquake, PSV reaction), and buried/subsea effects.

1. When Is Stress Analysis Required?

CaseMandatory?Code/Reference
ASME B31.3 (Process Piping)Yes if high T or large ΔTB31.3 §301.4
ASME B31.4 (Liquid Pipelines)Yes for all above-ground & critical buriedB31.4 §401.5
ASME B31.8 (Gas Pipelines)Yes for compressor stations, above-ground spansB31.8 §833
ASME B31.8S + API 579Flexibility + Fitness-for-Service
DNV-OS-F101 / ISO 13628Subsea pipelines & risers
Buried pipelines > DN400 or ΔT > 50°CUsually required (causes longitudinal stress)

2. Types of Stress Analysis

TypeWhat It ChecksCode Limits
Flexibility AnalysisSustained + Expansion (thermal, settlement)B31.3, B31.4, B31.8
Occasional AnalysisSustained + Wind/Earthquake/PSV< 1.33 × Sh or 1.5 × Sh
Fatigue AnalysisCyclic thermal or pressure (especially risers)SN curves (DNV, API)
Buckling / CollapseBuried (traffic) or subsea (external pressure)DNV-OS-F101, API 1111
Fracture MechanicsCrack-like defectsBS 7910, API 579

3. Step-by-Step Calculation Procedure (ASME B31.3 Example)

Step 1 – Define Load Cases (B31.3 Table 320.1)

Load CaseCombinationPurpose
SustainedW + P (internal pressure + weight)Hoop + longitudinal stress
ExpansionT1 – T2 (thermal expansion)Flexibility stress range
OccasionalW + P + Wind or Earthquake or PSVAllowable 1.33 Sh
OperatingW + P + TDisplacement check

Step 2 – Calculate Primary Stresses (Pressure + Weight)

Hoop stress (always checked):
σ_h = P × (D₀ – t) / (2t) ≤ Sh

Longitudinal sustained:
σ_L = P × D / (4t) + M_z / Z (bending from weight) ≤ Sh

Step 3 – Calculate Thermal Expansion Stress Range (Secondary)

Displacement stress range SE:
SE = √[ (ii × Mi)² + (io × Mo)² + 4 × Mt² ] / Z ≤ SA

Where:

  • SA = f (1.25 Sc + 0.25 Sh) (f = cycle factor)
  • ii, io = in-plane & out-plane stress intensification factors (B31.3 Appendix D)

Step 4 – Software Workflow

SoftwareBest ForLicense 2025
CAESAR II (Hexagon)#1 for ASME B31.3, B31.4, B31.8, EN 13480$$$
AutoPIPE (Bentley)Nuclear, buried, seismic, jacketing$$$
ROHR2 (Sigma)Europe (EN 13480), very good buried analysis$$
START-PROFCheapest professional, excellent buried$
PASS/START (NTI)Russian GOST + ASME$
SIMFLEX-IIQuick screeningFree–$

Step 5 – Typical CAESAR II Modeling Steps

  1. Input pipe properties (D, t, material, insulation, fluid)
  2. Define temperature & pressure cases
  3. Add supports/restraints:
  • +Y (vertical support)
  • Anchors, guides, rests, springs, expansion joints
  1. Add occasional loads (wind per ASCE 7-22 or EN 1991, earthquake per IBC/ASCE 7 or EN 1998)
  2. Run static load cases (SUS, EXP, OCC)
  3. Check code compliance report:
  • Sustained ≤ Sh
  • Expansion ≤ SA
  • Occasional ≤ 1.33 Sh
  • Restraint loads
  • Nozzle loads on pumps/compressors (API 610/617 limits)
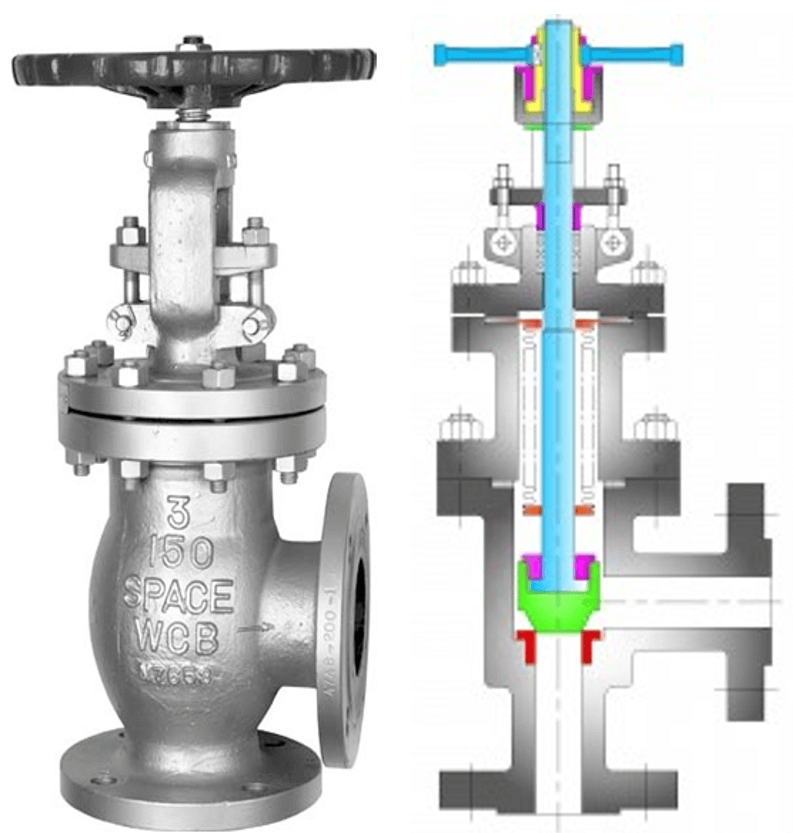
  • Flange leakage check (ASME VIII Div.1 App.2 or EN 1591)

Step 6 – Buried Pipeline Special Cases (ASME B31.4 / B31.8)

Longitudinal stress from temperature + Poisson:
σ_L = E α ΔT – ν σ_h + bending from soil settlement

Use CAESAR II or START-PROF buried module with:

  • Soil spring stiffness (ALA 2005 or EN 1998-4)
  • Virtual anchor length calculation
  • Maximum span between soil anchors

Step 7 – Quick Hand Calculation Example (Simple Case)

10” Sch40 carbon steel pipeline, 200 m straight run between two anchors, ΔT = 80°C, buried.

  • Material A106 Gr.B → E = 203 GPa, α = 12×10⁻⁶ /°C
  • Hoop stress σ_h = 90 bar × (273-8.18)/(2×8.18) ≈ 115 MPa
  • Fully restrained → σ_L = E α ΔT – ν σ_h
    = 203×10⁹ × 12×10⁻⁶ × 80 – 0.3 × 115×10⁶
    = 194.9 – 34.5 = 160 MPa (compressive)

Allowable compressive stress ≈ 0.9 Fy = 0.9×245 = 220 MPa → OK
But you need expansion loops every ~150–300 m depending on diameter.

4. Rules of Thumb

ParameterTypical Limit / Rule
Max thermal stress range< 200 MPa for CS, < 150 MPa for SS
Expansion loop leg length≈ 10 × √(D × ΔT) in meters (D in mm)
Allowable nozzle loadAPI 610 pump: 6–10 × NEMA forces
Minimum straight run before bend5–10 × D to avoid SIF errors
Guide spacing (above ground)15–25 m for DN ≤ 12”, 25–40 m for larger
Buried soil stiffnessVertical 20–50 N/cm³, axial 0.5–2 N/cm³

5. Deliverables of a Proper Stress Analysis Report

  • Critical line list
  • Isometric markups with support locations
  • CAESAR II input files (.c2)
  • Code compliance tables (sustained, expansion, occasional)
  • Restraint load summary
  • Spring hanger table
  • Flange leakage report
  • Expansion joint or bellows datasheet
  • Recommendations (add loops, change support type, etc.)

If you send me a specific line (diameter, temperature, pressure, routing sketch, support types), I can give you the exact loop size, support spacing, or run a quick CAESAR II calculation and send the results.


Pipeline pigging

Pipeline pigging services are essential for maintaining the integrity and efficiency of various pipeline systems . The primary types of pipeline pigging include cleaning, inspection, utility, and specialized pigs, each serving a crucial role in pipeline maintenance . The global pipeline pigging market is projected to reach $6 billion by 2025, demonstrating the growing reliance on these services across industries .

Here’s a detailed look at the types of pipelines that require pigging services:

  • Oil and Gas Pipelines: Pigging is a standard practice in the oil and gas industry, with an estimated 60% of operators utilizing these devices regularly for operational efficiency . These pipelines benefit from pigging to remove deposits, debris, and contaminants, which reduces the risk of corrosion, blockages, and costly repairs . Regular cleaning through pigging can improve pipeline flow rates by as much as 30%, significantly enhancing the system’s overall performance .
  • Water Pipelines: Pigging services are also vital for water pipelines . These services help maintain the cleanliness and integrity of the pipelines, ensuring efficient water flow and preventing contamination .
  • Chemical Processing Pipelines: Chemical processing pipelines require pigging to segregate products or fluids within the pipeline, preventing contamination and ensuring process integrity . Batch pigs are often used to manage different product batches, minimizing contamination and maximizing product recovery during transitions .
  • Aging Pipelines: A large percentage of pipelines worldwide are approaching their operational lifespan, increasing the need for inspection and cleaning . Approximately 50% of pipelines in developed regions are over 30 years old, boosting the demand for pigging services for consistent maintenance . Pigging services are অপরিহার্য for a wide array of industries to ensure the safe, efficient, and reliable operation of pipelines . By removing deposits, debris, and contaminants, pigging improves flow efficiency, prevents downtime, and extends the lifespan of pipeline infrastructure .

Valves that are not classified as full bore

Valves that are not classified as full bore typically have a smaller internal diameter than the nominal diameter of the pipe they are connected to, which may result in restrictions on flow. Here are common types of reduced bore and non-full bore valves:

1. Reduced Bore Ball Valve

  • Description: The internal diameter of the ball valve is smaller than the piped diameter.
  • Use: Suitable for applications where space and weight are critical and where slightly reduced flow is acceptable.

2. Globe Valve

  • Description: The flow passage in a globe valve is designed with a throttle that creates a restriction in the flow.
  • Use: Commonly used for throttling and regulating flow; provides good flow control but has higher pressure drops compared to full bore valves.

3. Gate Valve

  • Description: While many gate valves can be full bore, certain designs with reduced ports exist that limit flow.
  • Use: Primarily for on/off service but can be designed with reduced bores for specific applications.

4. Butterfly Valve

  • Description: Certain designs of butterfly valves (especially those with concentric designs) may not provide a full bore.
  • Use: Cost-effective and lightweight; used in low-pressure applications where flow control is necessary.

5. Check Valve

  • Description: Some check valves, particularly swing check valves, have a reduced internal diameter.
  • Use: Used to prevent reverse flow in piping systems; not ideal for applications requiring high flow rates.

6. Plug Valve

  • Description: Depending on the design, some plug valves may have a port that is smaller than the pipe diameter.
  • Use: Commonly used for on/off control in various industrial applications.

7. Pinch Valve

  • Description: The flow is controlled by pinching a flexible sleeve or bladder, which creates a reduced area for the fluid to flow through.
  • Use: Best for slurries and fluids containing solids, allowing for easy control and isolation.

8. Diaphragm Valve

  • Description: Not all diaphragm valves yield a full bore, particularly in tube-type designs.
  • Use: Suitable for handling corrosive fluids, slurries, and applications requiring tight shut-off.

Summary

Understanding the type of valve and its design is crucial for ensuring the performance meets the specific flow requirements of an application. Reduced bore valves, while advantageous in some cases, may lead to increased pressure drops and reduced flow rates compared to full bore options.


Complex Piping Design Analysis

Conducting a complex piping design analysis involves multiple steps that encompass planning, modeling, analysis, and optimization. Below is a comprehensive guide on how to perform such an analysis:

Step-by-Step Process for Complex Piping Design Analysis

1. Define System Requirements

  • Gather Data: Collect all relevant information including:
  • Piping and instrumentation diagrams (P&IDs).
  • Process flow diagrams (PFDs).
  • Design and material specifications.
  • Operating conditions (pressure, temperature, flow rates).
  • Fluid properties (density, viscosity, corrosiveness).
  • Identify Constraints: Take note of physical limitations (space constraints) and regulations (codes and standards).

2. Piping Layout and Routing

  • Create a Preliminary Design:
  • Use CAD software to develop a preliminary layout.
  • Ensure the layout minimizes bends and fittings, optimizing for straight runs where possible.
  • Consider Valves and Fittings:
  • Select appropriate fittings and valves based on the service.
  • Position them for ease of operation and maintenance.

3. Modeling the System

  • Use Advanced Software:
  • Create a 3D model using software such as CAESAR II, AutoPIPE, or PDMS.
  • Incorporate All Components:
  • Include pipes, valves, fittings, supports, and equipment connections in the model.
  • Define Material Properties:
  • Input mechanical properties (yield strength, Young’s modulus) and material grades.

4. Perform Stress Analysis

  • Identify Load Conditions:
  • Determine types of loads acting on the piping system:
  • Sustained Loads: Weight of the piping, fluid, and insulation.
  • Thermal Loads: Expansion or contraction due to temperature changes.
  • Dynamic Loads: Vibration, water hammer, and seismic forces.
  • Run Calculations:
  • Use the software to calculate stresses and displacements under defined load conditions.
  • Ensure that calculated stresses remain below allowable limits specified in relevant standards (e.g., ASME B31.3, B31.1).

5. Flexibility Analysis

  • Assess Thermal Expansion:
  • Evaluate how the piping system accommodates temperature variations.
  • Implement expansion loops, bends, or joints where necessary to prevent overstress.
  • Dynamic Analysis:
  • Perform dynamic simulations to assess response to transient events such as start-up or shutdown conditions.

6. Support and Anchor Design

  • Select Supports: Determine the type and location of supports (e.g., hangers, anchors, guides).
  • Ensure Adequate Spacing: Follow industry guidelines for support spacing to reduce sagging and maintain pipe alignment.

7. Validate with Field Data

  • Site Inspections: Conduct field inspections to confirm installation and support placement matches the design.
  • Physical Measurements: Verify that actual conditions align with your design assumptions.

8. Optimize Design

  • Analyze Results: Review stress, displacement, and load data to identify critical areas.
  • Make Adjustments:
  • Re-route piping if necessary.
  • Adjust support placement or types.
  • Change material thicknesses or grades based on stress results.

9. Documentation and Reporting

  • Compile Reports: Document all findings from modeling and analyses.
  • Ensure Compliance: Verify adherence to applicable codes and standards throughout the design.

10. Collaboration and Review

  • Peer Review: Get feedback from colleagues or external experts to identify potential oversights.
  • Stakeholder Input: Work with clients or project stakeholders to ensure the design meets all functional and regulatory requirements.

Key Considerations

  • Software Proficiency: Familiarize yourself with advanced piping analysis software that provides detailed and accurate models.
  • Interdisciplinary Coordination: Collaborate with other engineering disciplines (e.g., mechanical, civil) to ensure a well-integrated design.
  • Safety Factors: Always apply appropriate safety factors as dictated by design codes.

Summary

By following these steps, you can achieve an accurate and thorough complex piping design analysis, ensuring that the system is safe, efficient, and compliant with industry standards.


Types of Ball Valves

Ball valves are quarter-turn valves that use a hollow, perforated, and pivoting ball to control fluid flow . They are known for providing tight shutoff, durability, and ease of operation . Here are the main types of ball valves and their uses:

  • Standard Ball Valves: These are general-purpose valves suitable for a wide range of applications, including on/off control in various industries .
  • Full Port Ball Valves: The bore size is the same as the pipe’s inner diameter, offering unrestricted flow and minimal pressure drop . They are used when free, unobstructed flow is essential .
  • Reduced Port Ball Valves: The bore size is smaller than the pipe’s inner diameter, resulting in a slight pressure drop . They are more economical than full port valves and suitable for applications where some flow restriction is acceptable .
  • V-Port Ball Valves: The ball has a V-shaped notch, providing precise flow control . They are used for throttling applications requiring accurate adjustments .
  • Multi-Port Ball Valves: These valves have three or more ports, allowing for diverting or mixing fluids from different sources . They are used in complex piping systems where flow direction needs to be changed .
  • Flanged Ball Valves: These valves have flanged ends for easy installation and removal from piping systems . They are used in applications where valves need to be frequently inspected or replaced .
  • Threaded Ball Valves: These valves have threaded ends (NPT or BSP) for connecting to threaded pipes . They are used in smaller piping systems and low-pressure applications .
  • Welded Ball Valves: These valves are welded into the pipeline, providing a leak-proof connection . They are used in high-pressure and high-temperature applications where reliability is critical .
  • Hydraulic Ball Valves: Designed for high-pressure hydraulic systems . They are used in heavy machinery, construction equipment, and other hydraulic applications .
  • Brass Ball Valves: Commonly used in plumbing and low-pressure applications . They are suitable for potable water and other non-corrosive fluids .
  • PVC Ball Valves: Used for corrosive fluids and chemical applications . They are resistant to many chemicals and acids .
  • Stainless Steel Ball Valves: Offer excellent corrosion resistance and are suitable for a wide range of applications, including chemical, food, and pharmaceutical industries .

Piping Material Selection

The piping material selection process is a critical step in the design of any piping system . The goal is to choose materials that ensure the safe, reliable, and cost-effective transport of fluids while withstanding the operating conditions and environmental factors . Here’s a detailed explanation of the process:

  1. Define Service Requirements:
    • Fluid Type: Identify the fluid(s) to be conveyed, including their chemical composition and physical properties .
    • Operating Conditions: Determine the operating temperature, pressure, and flow rate ranges .
    • Codes and Standards: Identify applicable codes, standards, and regulations (e.g., ASME B31.3, B31.1, API standards) .
  2. Determine Material Properties Required:
    • Corrosion Resistance: Select materials resistant to internal and external corrosion based on the fluid’s corrosivity and the external environment .
    • Strength and Ductility: Ensure materials have adequate tensile strength, yield strength, and ductility to withstand operating pressures and mechanical stresses .
    • Temperature Resistance: Select materials that maintain their strength and integrity at the operating temperature range, considering creep, embrittlement, and thermal expansion .
    • Weldability: If welding is required, choose materials with good weldability to ensure sound joints .
    • Erosion Resistance: For abrasive fluids or high velocities, select materials with good erosion resistance .
    • Thermal Conductivity: Consider thermal conductivity for heat transfer applications or to prevent overheating or freezing .
    • Fatigue Resistance: For systems with cyclic loading, select materials with good fatigue resistance .
  3. Evaluate Material Options:
    • Carbon Steel: A common and cost-effective material for many applications, but susceptible to corrosion in some environments .
    • Stainless Steel: Offers excellent corrosion resistance and high-temperature strength, suitable for corrosive fluids and high-temperature services .
    • Alloy Steel: Used for high-temperature, high-pressure, or specialized applications requiring enhanced strength, creep resistance, or corrosion resistance .
    • Non-Ferrous Metals: Copper, aluminum, and nickel alloys are used for specific applications based on their unique properties (e.g., high thermal conductivity, corrosion resistance) .
    • Plastics: PVC, CPVC, PP, PVDF, and other plastics are used for corrosive fluids, low-pressure applications, and deionized water systems .
  4. Consider Fabrication and Installation Requirements:
    • Welding: Select materials that can be easily welded using standard welding procedures .
    • Formability: Consider the material’s formability for bending, threading, and other fabrication processes .
    • Availability: Ensure that the selected materials are readily available in the required sizes and forms .
  5. Assess Cost:
    • Material Cost: Compare the cost of different materials, considering both the initial cost and the long-term cost of maintenance and replacement .
    • Fabrication Cost: Consider the cost of welding, forming, and other fabrication processes .
    • Installation Cost: Evaluate the ease of installation and any special requirements (e.g., specialized welding procedures, supports) .
  6. Check Industry Standards and Regulations:
    • ASME B31.3: Specifies material requirements for process piping .
    • ASME B31.1: Specifies material requirements for power piping .
    • API Standards: Provide guidelines for material selection in the petroleum and natural gas industries .
    • Local Regulations: Ensure compliance with local building codes and environmental regulations .
  7. Make Final Selection:
    • Document the Selection Process: Document the rationale for selecting the chosen materials, including the factors considered and the alternatives evaluated .

By following these steps, engineers can select the most appropriate piping materials for a given application, ensuring the safety, reliability, and longevity of the piping system .


Valves Selection

To select a valve, follow these steps while considering the service conditions, valve functions, and cost :

  1. Determine the Valve Function: Decide if the valve will primarily be used for on/off control, throttling, preventing backflow, or specialty purposes such as pressure relief . Different valve types are better suited for specific functions .
  2. Identify Service Characteristics:
    • Fluid Type: Determine if the fluid is a liquid, gas, steam, slurry, or solid .
    • Fluid Properties: Identify if the fluid is clean, dirty, abrasive, corrosive, viscous, or hazardous .
    • Pressure and Temperature: Determine the operating pressure and temperature ranges .
  3. Consider Valve Characteristics: Evaluate application and structural characteristics to ensure proper installation, repair, and maintenance .
  4. Assess Operation and Maintenance Requirements:
    • Fire Resistance: Determine if fire-safe features are needed .
    • Operability: Consider the required speed of operation (e.g., quarter-turn, multi-turn) and actuation method (manual, electric, pneumatic, hydraulic) .
    • Leak Tightness: Determine acceptable leakage rates (internal and external) .
    • Maintainability: Consider ease of access for maintenance and replacement .
  5. Evaluate Valve Types:
    • Gate Valves: Suitable for on/off service with minimal flow restriction .
    • Globe Valves: Used for throttling and on/off service, but with higher flow restriction .
    • Ball Valves: Provide quarter-turn on/off operation with low-pressure drop .
    • Butterfly Valves: Compact and lightweight, suitable for on/off and throttling of large flows .
    • Plug Valves: Offer quarter-turn on/off operation, often used for diverting flow .
    • Diaphragm Valves: Suitable for corrosive or contaminated fluids .
    • Check Valves: Prevent backflow in a piping system .
  6. Consider the Cost: Evaluate not only the initial cost of the valve but also the installation, maintenance, and lifecycle costs .
  7. Check the valve size: Proper valve sizing is crucial for optimal performance. Use valve flow coefficient (Cv) calculations and consult valve manufacturers’ data to determine the correct size .

Types of Gate valves

Gate valves are classified based on the type of disc, body-bonnet joint, and stem movement . Here’s a breakdown:

I. Based on Disc Type:

  • Solid Wedge Gate Valve: This is the most common and basic type, known for its simplicity and strength . It’s a single, solid piece and suitable for most fluids and turbulent flow .
  • Flexible Wedge Gate Valve: This has a one-piece disc with a cut around the perimeter to provide flexibility . This design is better for thermal expansion and prevents thermal binding, often used in steam systems .
  • Split Wedge (Parallel Disc) Gate Valve: It has two solid pieces held together by a mechanism . This allows each disc to adjust to the seating surface and is suitable for noncondensing gasses and liquids .

II. Based on Body-Bonnet Joint:

  • Screwed Bonnet: This is a simple, inexpensive design .
  • Bolted Bonnet: This is the most common type, using a gasket to seal the joint .
  • Welded Bonnet: It’s a design where disassembly is not required, and it’s lighter than bolted bonnets .
  • Pressure-Seal Bonnet: Used for high-pressure and high-temperature applications, where increased pressure improves the seal .

III. Based on Stem Movement:

  • Rising Stem (Outside Screw and Yoke – OS&Y): The stem rises when the valve is opened, giving a visual indication of the valve position . The stem threads are outside the valve, protecting them from the fluid .
  • Non-Rising Stem (Inside Screw): The stem does not rise or lower; instead, it rotates, making it suitable for tight spaces . The stem threads are exposed to the fluid .

Additional Types:

  • Knife Gate Valve: This is designed with a sharp edge to cut through thick fluids and slurries, often used in industries like mining and paper .
  • Through-Conduit Gate Valve: This type has a gate that’s fully enclosed when open, which is designed to maintain a smooth, uninterrupted flow path. It’s commonly used in pipelines where pigging is required .

Globe Valves

Globe Valve Types based on Body Bonnet Connection


Screwed bonnet: This is the simplest design available and it is used for inexpensive valves.
Bolted-bonnet: This is the most popular design and used in a large number of globe valves. This requires a gasket to seal the joint between the body and bonnet.
Welded-Bonnet: This is a popular design where disassembly is not required. They are lighter in weight than their bolted-bonnet counterparts.
Pressure-Seal Bonnet: This type is used extensively for high-pressure high-temperature applications. The higher the body cavity pressure, the greater the force on the
gasket in a pressure -seal valve.

Application of Globe valve
Globe Valves are used in the systems where flow control is required and leak tightness is also important.
It used in high-point vents and low-point drains when leak tightness and safety are major concerns. Otherwise, you can use a gate valve for drain and vent.
It can be used in Feed-water, chemical, air, lube oil and almost all services where pressure drop is not an issue
This valve is also used as an automatic control valve, but in that case, the stem of the valve is a smooth stem rather than threaded and is opened and closed by lifting action of an actuator assembly.

Advantages
Better shut off as compared to gate valve
Good for frequent operation as no fear of wear of seat and disk
Easy to repair, as seat and disk can be accessed from the valve top
Fast operation compares to gate valve due to shorter stroke length
Usually operated by an automatic actuator

Disadvantages
High head loss from two or more right-angle turns of flowing fluid within the valve body.
Obstructions and discontinuities in the flow path lead to a high head loss.
In a large high-pressure line, pulsations and impacts can damage internal trim parts.
A large valve require considerable power to open and create noise while in operation.
It is heavier than other valves of the same pressure rating.
Costlier compared to the gate valve


Types of Globe Valve

Depending on the type of body there are three types of globe valves;

  • Z types
  • Y types
  • Angle Types

Z types Globe Valve

The simplest design and most common type is a Z-body. The Z-shaped partition inside the globular body contains the seat. The horizontal seating arrangement of the
seat allows the stem and disk to travel at a perpendicular to the pipe axis resulting in a very high-pressure loss.
The valve seat is easily accessible through the bonnet which is attached to a large opening at the top of the valve body. Stem passes through the bonnet like a gate
valve.
This design simplifies manufacturing, installation, and repair. This type of valve is used where pressure drop is not a concern and throttling is required.

Y types Globe Valve

The Y-type design is a solution for the high-pressure drop problem in Z-type valves. In this type, seat and stem are angled at approximately 45° to the pipe axis. Y-body valves are used in high pressure and other critical services where pressure drop is concerned.

Angle types Globe Valve

Angle globe valve turns the flow direction by 90 degrees without using an elbow and one extra pipe weld. Disk open against the flow. This type of globe valve can be
used in the fluctuating flow condition also, as they are capable of handling the slugging effect.


Gasket Selection (based on ASME)

1. Identify Application Requirements

    • Service Conditions: Determine the operating temperature, pressure, and medium (e.g., gas, liquid, corrosive chemicals) the gasket will be exposed to.
    • Flange Type: Identify the flange design (e.g., raised face, flat face, ring-type joint) per standards like ASME B16.5 or B16.47.
    • Piping or Vessel Code: Confirm the applicable ASME code (e.g., ASME B31.3 for process piping or ASME Section VIII for pressure vessels).

2. Select Gasket Material

    • Compatibility: Choose a material compatible with the process fluid to avoid degradation (e.g., rubber, PTFE, graphite, or metallic materials like stainless steel).
    • Temperature and Pressure Limits: Ensure the material can withstand the maximum temperature and pressure of the system. ASME standards provide guidance on material performance under these conditions.
    • Corrosion Resistance: Consider the environment and potential galvanic corrosion between the gasket and flange materials.

3. Determine Gasket Type

    • Non-Metallic Gaskets (ASME B16.21): Soft gaskets (e.g., rubber, PTFE, compressed fiber) for low-pressure, non-critical applications.
    • Metallic Gaskets (ASME B16.20): Spiral-wound, ring-type joint (RTJ), or solid metal gaskets for high-pressure, high-temperature, or critical services.
    • Semi-Metallic Gaskets: Combination of metal and filler (e.g., spiral-wound with graphite) for versatility in moderate to severe conditions.

4. Size and Dimensions

    • Match the gasket dimensions to the flange size, adhering to ASME B16.20 (metallic gaskets) or B16.21 (non-metallic gaskets). This includes inner diameter (ID), outer diameter (OD), and thickness.
    • Ensure proper fit to avoid overhang or insufficient coverage of the sealing surface.

5. Evaluate Gasket Performance Factors

    • Seating Stress: Calculate the minimum and maximum seating stress required to achieve a seal, using ASME Section VIII, Division 1, Appendix 2. This involves gasket factors “m” (maintenance factor) and “y” (yield factor).
        • m: Ensures the gasket maintains a seal under operating pressure.
        • y: Ensures sufficient initial compression during bolt tightening.
    • Bolt Load: Confirm the bolt load is adequate to compress the gasket without exceeding flange or gasket limits.

6. Consider Design and Installation

  • Flange Surface Finish: Verify the flange surface roughness aligns with gasket type (e.g., smoother finish for soft gaskets, specific serrations for spiral-wound).

Screw Thread Series

Coarse Thread Series, UNC/UNRC: The coarse thread series UNC/UNRC is the most commonly used thread system used in the majority of screws, bolts, and nuts. It is used for producing threads in low strength materials such as cast iron, mild steel, and softer copper alloys, aluminum etc. The coarse thread is also used for rapid assembly or disassembly.

Fine Thread Series, UNF/UNRF: This is used for applications that require a higher tensile strength than the coarse thread series and where a thin wall is required.

Extra-Fine Thread Series, UNEF/UNREF: This is used when the length of engagement is smaller than the fine-thread series. It is also applicable in all applications where the fine thread can be used.

Unified Standard Series and Selected Combinations, Unified Standard Series: The preferred threads to be used are either the coarse thread series or the fine thread series described above. The fit of screws threads (class 2A/2B and class 3A/3B), as well as the allowances, max and min. major/minor, pitch diameters are described in this table for all the threads, including UNC, UNF, UNEF, UN, UNR series.

Fine Threads for Thin Wall Tubing in the 27 thread series are used for thin wall tubing in the ¼ to 1 inch nominal size. The minimum recommended length of thread is 1/3 of the nominal diameter + 5 threads (+ 0.185 inch). These are included in the Unified Standard Series.

Special Combinations: Thread data are tabulated for certain special combinations of diameter and pitch, with pitch diameter tolerances based on a thread engagement length of 9 x Pitch. The pitch diameter limits are applicable for a length of engagement of 5 to 15 times the pitch. (The length of thread on mating parts, however, may exceed the length of engagement by a large amount) These threads are designated by UNS and UNRS. These are included in the Unified Standard Series.


Basic Hydrotest requirements

1- Filling pump (high flow rate )

2- Pressure Pump (high head)

3- Manual pump (for small loops)

4- High pressure hose 150 bar

5- Non asbestos sheets

6- Small Fitting ½” ¾”

7- Ball, check & safety valves

8- Pressure gauges

9- Compressor 10 bar